Replacing a garbage disposal switch is a tricky task. Just as much you wish to avoid doing the electrical work, at one point or another you will have to replace the switch to save yourself the electrician costs.
How to replace a garbage disposal switch at home? With thorough learning and basic research, you find all the necessary instructions you need to replace a disposal switch.
The good news is that the process is smooth and can go easily and we are here to guide you to replace the disposal switch properly.
Things And Tools You Need to Prepare

Replacing a garbage disposal switch is easier as compared to installing the switch for the first time. There are fewer things required if the old switch had its parts such as the outlet already installed.
While you might think this process requires extra expertise, it does not. All you need are basic tools that are used in day-to-day tasks and are easy to handle as well.
However, the tools you need to have are:
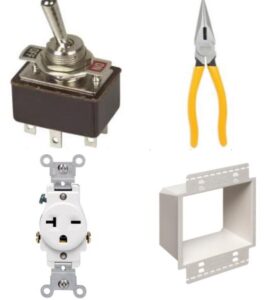
- Outlet box extender to install the outlet. If you are replacing the disposal, this might already be installed on the cabinet wall. If the old one is broken or rusty, do replace it.
- Single outlet if you need it just for the disposal, double outlet to plug in additional dishwater or any other device.
- Toggle switch.
- Needle nose pliers to wrap the wire around the screw, you can do it by hand too if you prefer.
- Electrical tape to cover any bare and open wires.
How To Replace an Air Switch?

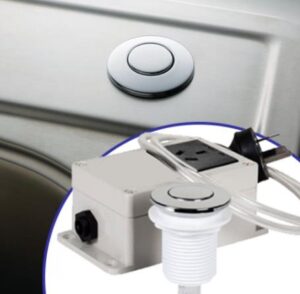
An air switch is a great way of making the operating of garbage disposal easier. All you have to do is press the button mounted on your countertop and voila! the disposal will turn on, similarly, pressing the button again turns off the disposal.
Installing an air switch does not require any extra help or special expertise on the electrical subject either. The instructions are easy to follow through and mostly work without a problem.
However, drilling the hole into your countertop might sound like a scary task but it is not so demanding. All you need is a drill with a circular drill bit of the required size to make a hole of the required size of that of the air switch.
It is one of the easy and preferred garbage disposal switches among people.
Tips To Remove an Air Switch
An air switch has an easy assemble that is easy to put into use and just as easy to uninstall. This procedure usually does not require additional time and effort and is done rather quickly.
- Turn off the power by using the toggle switch.
- You can start by removing the hose from the main power adapter that is plugged into the outlet.
- Next, detach the garbage disposal cord from the main adapter.
- Remove the main power adapter from the power outlet.
- Remove the rubber used to tighten the air switch passing through the hole drilled at the countertop.
- Give the air switch few rotations, it will loosen up.
- You can then remove it from the countertop.
Guides To Install a New Air Switch
If you are installing a new air switch, there must have been something wrong with the old one. Maybe the main adapter fused, or the hose was unfunctional or the button broke. Whatever, it was, it is important to figure out the issue, so such problem does not occur again.
Get yourself a new air switch, you can find one easily on the market.
Follow these steps to install a new air switch:
- Insert the air switch through the hole you have drilled at the countertop.
- Insert the rubber ring from underneath to tighten the switch.
- Attach the hose to the switch and tighten it properly.
- Next, attach the garbage disposal power cord to the main adapter that came along with the switch.
- Plug the adapter to the power outlet.
- There will be an outlet for the hose at the top or bottom of the adapter.
- Insert the hose into the power adapter, tightening it to make sure the air is properly supplied.
- The installation process is complete.
- Turn on the switch.
- Then run the garbage disposal by pressing the button installed on the countertop.
How To Replace a Wireless Switch?

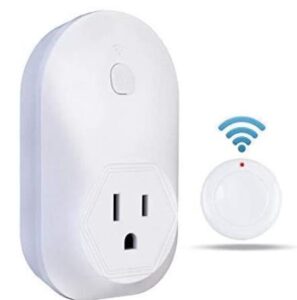
If your electrical wall switch is installed in the open cabinet space, you might accidentally bump into it and turn on the disposal by accident. In such a way, something unusual can go down the drain quickly. To take care of such horrors for you, a wireless garbage disposal switch is available.
With a wireless switch your safety is ensured and it is easy as well to operate the disposal from a safe distance to save yourself from the electrical shocks of a wall switch.
Tips To Remove a Wireless Switch
If you are replacing a wireless switch, here is how to remove the previous one:
- Turn off the switch.
- Remove the disposal’s power cord from the power adapter of the wireless switch.
- Detach the power adapter from the outlet.
- Remove the button from wherever you had it placed.
Guides To Install a Wireless Switch
You can easily get a wireless switch for your disposal from market. The things you need are all included in the package.
To install a wireless switch, follow these steps:
- Attach the disposal’s power cord to the main power adapter of the wireless adapter.
- Plugin the adapter.
- Turn on the switch.
- Your wireless switch might come with either a button or a remote.
- If there is a remote you can simply use it from afar to turn on the disposal.
- If you prefer a button, you can stick the button in the desired location, whether it be on the wall of cabinet or on the countertop.
- Press the button and your garbage disposal will turn on.
- Similarly, press it again to turn it off.
How To Replace a Foot Switch?

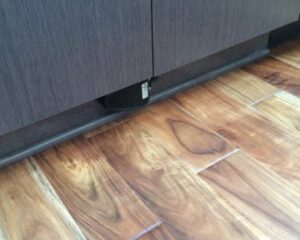
A garbage disposal can also be operated by a footswitch. They are an innovative way of using your disposal. It also makes the process easier, by not having to reach the wall for the button. You can simply turn on the disposal by clicking the switch at the bottom of the cabinet with your toe.
If you are wondering you can easily hit the footswitch and accidentally turn it on, well it will not happen. The footswitch is made to operate in a way that is completely safe. First, you press it upwards with your foot and then move it in the right direction to turn it on.
Tips to Remove a Foot Switch
Following these instructions is how you remove a footswitch:
- Turn off the power.
- Remove the switch and disposal’s power cord from the outlet.
- Pass it through the hole and remove the wire completely.
- Next, unscrew the switch to remove it from under the cabinet.
- Open the switch’s cover and unscrew the wires and remove it.
- Put the cover back on the switch and screw it.
- Remove all the wires and plug, and the uninstallation is done.
Guides To Install a Foot Switch
Installation of a footswitch might be tricky, follow these steps to install:
- Turn off the power.
- Plugin the cord to decide the right location for your footswitch under the cabinet.
- Unplug the cord once you have decided the location for the switch.
- Use a ruler or a measuring tape to measure the space for your cabinet hole.
- Place the rule at the edge of the cabinet and measure the depth for the cabinet hole.
- Drill a small hole into the cabinet base so the power cord may pass.
- Using a screw, remove the foot switch’s cover.
- Pass the power cord through the cover and attach it to the terminal located on the footswitch.
- Tighten the terminal screws to make sure the wires are in place.
- Put the cover back on and screw it.
- Screw in the switch by choosing the right-center on the cabinet and making sure it is under the base of the cabinet.
- Plugin the disposal power cord into the adapter.
- Plugin the adapter and turn on the power.
- Run the disposal to test the footswitch.
What Kind of Switch Works Longer?
Let’s talk about different types of garbage disposal switch and their durability.
Does It Matter What Type of Switch You Use?
Yes, definitely it does. The type of disposal switch you use should align with your requirements and your preference. Using a garbage disposal is a daily task and if you get the wrong type of switch, such easy work can turn into hectic work for you.
What To Look for In a Garbage Disposal Switch?
To make sure a garbage disposal switch lasts long enough for you, there are few things you need to look out for:
Durability
The durability of the switch you are getting is essential. Getting an air switch that can rust easily or a foot switch that breaks down after a few uses, can cost you too much.
It can cost your time spent on installing and also impact your budget. Hence, look for the right material as per your requirements to make sure it lasts long for you.
Is It Compatible with Your Disposal or Not?
Make sure that the type of disposal switch you are getting is compatible with your garbage disposal. Most switches are made to the universal standard and are compatible with most garbage disposals, nevertheless, each manufacturing company might have a different standard. Hence, it is necessary to check the compatibility of the switch.
Design Of the Switch

You might think the design of the switch does not even matter, but it does. Installing a copper-colored air switch can look bad on your black-colored countertop. Hence, choosing the right design that includes the size and the color etc, is crucial.
Budget
While garbage disposal switch is not expensive, some people might try to save money and keep themselves from getting a quality product. Even if you are on a tight budget, you can easily get yourself a good-quality disposal switch for a suitable price.
If you try to save too much, you might just end up spending on a switch that will need replacement within few months.
So Which Type of Switch Lasts Long?
To conclude the answer to “what kind of switch works longer”; it is understood that it all depends on your requirements and how much you are willing to invest yourself to acquire the knowledge about getting the right switch. Getting one that fits your requirements, is definitely the one that lasts well enough for you.
Click here to see more differences between switches.
Click here to see the best switches for garbage disposal.
Safety Tips on Installing a Garbage Disposal Switch
Working around garbage disposal can be risky if you do not take the necessary precautionary measures. Installing garbage disposal revolves around plumbing and electrical work.
While installing a garbage disposal switch, you need to make sure to check out the list of the following safety measures. Since the installation of a switch revolves around electrical work, it can be seriously harmful if instructions are not followed properly.
- Locate the circuit breaker of your garbage disposer and turn off its power.
- Make sure all pipes of the disposer are tight and there is not even a hint of water around.
- Once you have removed the faceplate of the outlet, use a voltage tester.
- Use the voltage tester on the terminals where the black wire is connected to make sure there is no power in the switch, if there is, wait out few minutes and check again until it is gone.
- Use electrical tapes to completely cover any bare wires inside the outlet.
- Screw-in the switch properly to make sure no wire is loose.
- Tighten the faceplate back on, do not let it hang loose.
These are basic measures one should take while installing a disposal switch. You might need to take extra measures as per your need. For example, if you are sensitive to bare electrical wires and prefer not to touch them you might use the electrical gloves to make sure it is safe.
Conclusion
Whenever someone mentions the thought of getting garbage disposal, they are surely known to talk about how hard the installation process is. Considering the old heavy-duty disposals, in old times it really was hard to install disposal. Such stigma has followed around to current days, calling the whole process hard.
Whereas nowadays, new, and modernized garbage disposals are made to add ease in daily kitchen work. While it is still technical work, the installation is made far easier by different quick mounting systems.
Installing a disposal switch is part of that process, and with basic knowledge, you will learn how easy it actually is. And if it comes to replacing the switch you will have all the necessary information to make the process even smoother.
